Tuesday, December 17, 2013

Just Another Reupholstering Chair Day

There is tonnes of snow on the ground and close to minus 30! 
 Brutal Saskatchwan, Brutal.


So as I always say -- When life throws you snow, reupholster chairs.

I got these beauties both for $10 from a wonderful lady on Kijiji. 


Unfortunately, they were pretty ugly and stained.


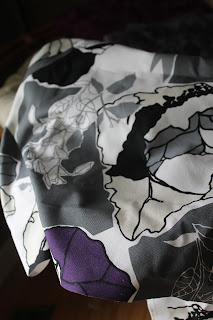
 So I ripped off the fabric, while wearing a nose plug the whole time.  They reeked of the 1950s. 

I was left with this lovely base - patched several times and the stuffing worn so much 
you could see through it.

I bought some foam and traced out the shape of the base on it. and cut it with an exacto knife. Fun! 


I staple gunned the material to the base over the foam and base the same way I did my other chairs.  
Then I flipped em over and screwed them back into the frame.


And there she blows.  May have to stain the back too... although I do like the worn look.  
What do you think? Should I stain the frame as well?


Thursday, August 29, 2013

Another Dresser Re-do

So, its been almost a month in my new townhouse and I'm thoroughly enjoying it.  A new chance to decorate, and of course I need some more furniture to fill the place! 

And man, that down payment just hurts. So I love doing things cheap. 

So I redo... that's just what I do.


Well here is another little guy I picked up from Kijiji, it was part of the set I posted earlier.


So first I just roughed him up -- an electric sander did the trick -- but I also had to use just some sand paper for the little parts I couldn't get to.  I made sure to wipe off all the dust with a wet cloth and let it dry.


Then, I painted just a white primer over all of it. 


And finally the 2 coats of regular paint...

As you can see -- what I did wrong on this one was use a roller that was for rough surfaces instead of smooth to semi-smooth, which I should have done -- so it left me all these bumps. Rookie mistake. 

Eventually I evened them out but it was a real pain. 


I really learned with both of these dressers that they are fussy little things! Each nook and cranny -- lots of prep work -- and all the little details really do count. When in doubt -- google it or ask someone that knows Don't just do it. 


Now he's my buddy - holdin my jewelry for me. He's a real help and fits nicely into my nook.

Thursday, August 22, 2013

DIY Dresser Re-do

You know what gets me excited? A chance to re-do some furniture!
I get that little tingly feeling inside and its hard to control.


I found this dresser on Kijiji along with 2 nightstands, a mirror, a bed frame and another taller dresser for $150. They are in immaculate shape. They were ok looking, but I bought them with the intention to do something magical....! 

So I sanded and painted, and painted some more and was quickly thrown into a mad fuss about getting it how I liked it.  I seriously did a primer coat plus 4 coats on this guy. He was a tough one to cover.

I spray painted the pulls silver - it was really the only thing I could do. I could not for the life of me find a size to match the small ones... but that's ok, I actually really like them how they are.


First, I used this as a buffet in my dining room... and recently moved it to hold my ancient TV. Gotta love the versatility! Hopefully with the money I saved on this I can replace the tube... When you can barely lift one of your electronic pieces these days, you know its time to replace :).

So the moral of the story is -- look for potential in the furniture you look at! Think of every possibility and you will save a lot of bucks!

Wednesday, July 3, 2013

Chevron Pillows

I get sick whenever I see pillows for sale for $20.  
Honestly?? They cost like $2 to make.  The business woman in me just thinks Cash Grab!!

Usually I always say I'm going to make them but never do. So I end up with no pillows. Well, it finally happened. I made some pillows out of the leftover material from my lamp shades. 

I took that sewing machine by the horns. Cut two identical rectangle pieces, flipped them inside out and sewed all the sides together, leaving a little gap for to stuff it.


Wow do they ever take a lot of stuffing. Then I just hand sewed the rest. Easy peasy.


Saturday, June 15, 2013

Reupholstered Folding Chairs!!

Some times you just need to spice life up a bit.


I bought these chairs at a garage sale a little while ago! I got a great deal.. but they just needed a little somethin' somethin'.


This is the fabric I got from Ikea a while ago. I was originally going to make pillows. Then I realized I already had 10 too many.  A little bit addicted...? I think so.
So... I thought I would try strappin' it on to my 'soon to be' lovely chairs.


So I flipped 'er over and unscrewed the seat from the chair. 


Measured out just the right amount of material so there was about 1-2" once I pulled it over the chair.


My handy dandy staple gun did the trick here. I had to pull super tight when stapling the opposite sides. No bumps wanted. 


The corners are the tricky part. I tried a couple different ways- I found it most successful when I looked at the front of the seat and just folded it with my hands behind there - then stapled it as soon as I got it good. I found it easy to fold over one piece at a time - like shown above.

This is an example of a not so good corner.

I did better on this one. :)

I had to find the holes for the screws through the material -- that was a little bit tough at the beginning but it became easy as I did it more. 


 And here they are. I was just a tad bit proud of these guys. They were way easier than I though and literally only took me 1 hr for four of them. 

Might be doing a little more of this in the future....!


Thursday, March 14, 2013

New curtains!

I put new curtains up in my bedroom. My life just keeps getting more and more exciting. 
Ya I know, real exciting.


Ya I just threw it all out there.

And there she is folks.
Ahh so much better!

Now to find some different shams to replace my blue ones. This is just a never ending battle.


Friday, March 8, 2013

A Little bit o' the Home

Ok, so maybe its about time I show a little of my pad.
Don't be too hasty. One piece at a time.


My papasan chair is my staple book reading chair, and also the occasional nap spot. If it were a person, I'd probably marry it. But since it isn't, I'll settle for the odd snuggle.


I posted a while ago about reorganizing your bookshelf. To be honest, I just really love bookshelves in general.  For a long time, I'd been wanting a checker box book shelf -- so last year I finally got one and I absolutely love it. 

So there you have it... just a few of my fav's that I felt compelled to share!

Friday, January 25, 2013

DIY Fabric Lamp Shade Re-do


I found a pair of lamps at the Salvation Army for $10..... I just had this image in my head of how great they could be!! They had a great shape, were in great condition and I really liked how big they were. 

So here's what I came home with:  2 of them to be exact.


What you will need:

1. Lamp shades (preferrably same length on top and bottom)
2. Spray adhesive
3. Glue gun 
4. Fabric 


I bought some great fabric from Hobby Lobby, and I saw some chevron material that I loved immediately. 
First, I measured the length of the shades and cut out the material, and left a few more inches on each side to fold over the top.  

I took spray adhesive and sprayed the back of the fabric, slowly wrapped it around the shade, smoothing it as I went.  I would recommend gluing the top and bottom with a glue gun just to secure it.


Put the pieces together and here they are!


Related Posts Plugin for WordPress, Blogger...